

How to Install Windows 11 on Mac | Step-by-Step Guide

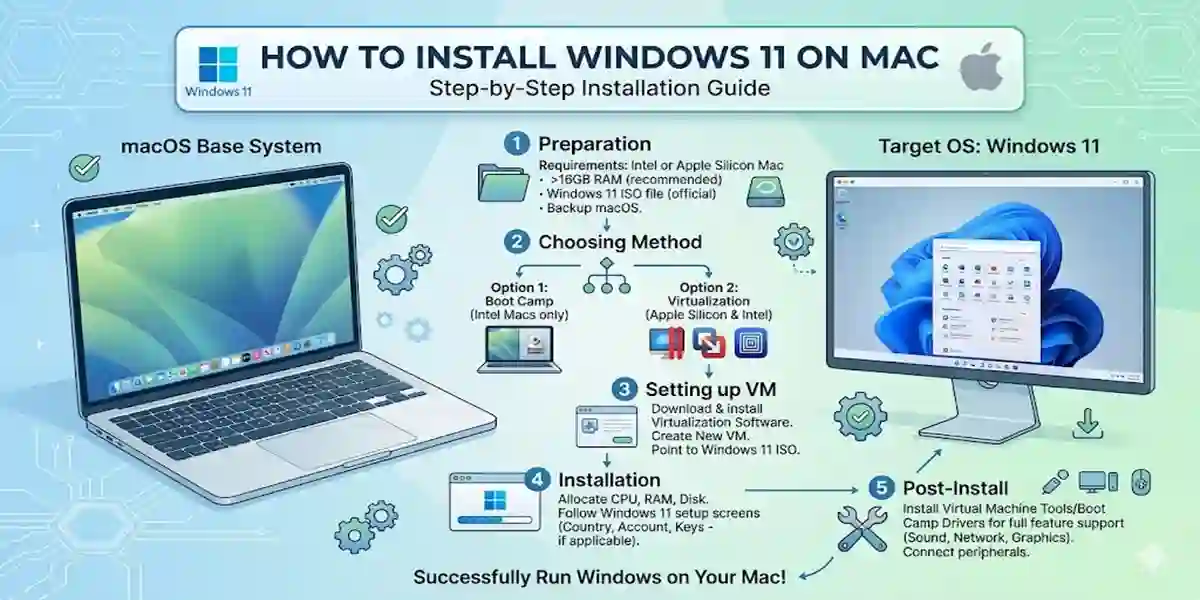
Introduction
Many Mac users need Windows for work, school, gaming, testing, business software, or apps unavailable on macOS. The good news is you can install and run Windows 11 on a Mac. However, the method depends on the type of Mac you have.
For newer Macs with Apple Silicon chips (M1, M2, M3, or newer), the best option is to run Windows 11 via a virtual machine. Older Intel-based Macs have more options, although Boot Camp is generally suited for Windows 10 rather than Windows 11.
In this guide, we’ll explain how to install Windows 11 on Mac, what tools you need, and how to activate Windows 11 Pro with a genuine product key from Codesforever.
Features of Installing Windows 11 on Mac
Two Completely Different Paths, Depending on Your Mac
Intel-based Macs use Boot Camp Assistant, built into macOS, for a true dual-boot install — Windows 11 runs on real hardware with its own partition, and you choose your OS at startup.
Apple Silicon Macs (M1 through M5) don't have this option. Boot Camp doesn't exist here — Apple removed the firmware hooks it relied on. Windows 11 runs inside a virtual machine instead, using the ARM64 build of Windows 11, not the x86 version.
Your Three Legitimate Options on Apple Silicon
Parallels Desktop costs from roughly $99.99/year for the Standard tier and is the only option officially authorized by Microsoft to run Windows 11 on Apple Silicon. It handles the Windows 11 download automatically and typically takes around 10 minutes to set up — the best fit for most users.
VMware Fusion has been free for personal use since Broadcom's acquisition of VMware in late 2024. It's a strong budget option for power users and developers comfortable with more manual setup, typically taking around 20 minutes.
UTM is free and open-source, built for hobbyists and tinkerers. It has the longest setup time (30+ minutes) and noticeably weaker graphics acceleration than the other two, making it a poor fit for anything graphics-intensive.
Key Feature Differences
- Microsoft authorization: Only Parallels Desktop is officially authorized by Microsoft to run Windows 11 on Apple Silicon, with an automatic, licensed Windows 11 download built in.
- Coherence/Unity mode: Parallels' Coherence mode and Fusion's Unity mode let Windows apps appear as windows on your Mac desktop, without a visible Windows desktop shell around them.
- Snapshots: All three tools support VM snapshots, so you can save a clean state and roll back after testing risky software.
- Emulation limits: Windows 11 ARM uses Microsoft's Prism emulator to run most x86/x64 apps, but kernel-level anti-cheat games, certain custom drivers, and some 32-bit installers still won't run in any virtualization scenario.
- Resource sharing: Unlike Boot Camp's dedicated partition, virtualized Windows shares your Mac's RAM and CPU with macOS while running.
Commands for Installing Windows 11 on Mac
For Intel Macs (Boot Camp, Native Dual-Boot)
Launch Boot Camp Assistant from Terminal:
open /Applications/Utilities/"Boot Camp Assistant.app"
Check your disk partition layout before starting:
diskutil list
Verify free space on your target disk:
diskutil info disk0 | grep "Free Space"
Check your exact Mac model, which determines which Windows versions Boot Camp Assistant supports:
system_profiler SPHardwareDataType
Reboot directly into Windows after installation:
bootcamp -windows
Alternatively, hold the Option key at startup to choose the boot volume manually.
Return the disk to a single macOS partition later, if needed: open Boot Camp Assistant again and choose "Restore to a single macOS partition" from within the app — this isn't a Terminal-only operation.
For Apple Silicon Macs (Parallels, VMware Fusion, or UTM)
Check your Mac's chip, to confirm it's Apple Silicon before choosing a virtualization path:
sysctl -n machdep.cpu.brand_string
Check available RAM (16 GB minimum strongly recommended for Windows VMs):
sysctl hw.memsize
Check free disk space (a Windows 11 VM typically needs 64GB or more):
df -h /
Install Parallels Desktop via Homebrew, if you prefer command-line installation:
brew install --cask parallels
Verify your installed VMware Fusion version from Terminal:
mdls -name kMDItemVersion /Applications/VMware\ Fusion.app
Install UTM via Homebrew:
brew install --cask utm
Download the Windows 11 ARM64 ISO directly, for VMware Fusion or UTM, which require manual download (Parallels automates this step):
curl -L -o Win11_ARM64.iso "https://software-static.download.prss.microsoft.com/[current-signed-URL-from-microsoft.com/software-download/windows11arm64]"
Always get the actual signed URL from Microsoft's official Windows 11 for ARM download page at the time of download — these URLs expire and are session-specific, so a hardcoded link here would fail.
Inside the Windows 11 VM, once installed, check activation status:
slmgr /dli

slmgr /xpr
Check TPM status inside the Windows 11 VM — all three tools emulate a virtual TPM 2.0:
Get-Tpm
Can You Install Windows 11 on Mac OS?
Yes, Windows 11 can be installed on Mac OS using virtualization software. Apple Silicon Mac users (M1/M2/M3/M4) require the ARM version, while Intel Macs can use standard ISO images.
Virtualization allows you to run Windows apps without replacing macOS. Microsoft officially recognizes Parallels Desktop for Windows 11 ARM on Apple Silicon Macs.
Best Ways to Install Windows 11 on a Mac
The three main ways to run Windows 11 on macOS are Parallels Desktop, VMware Fusion, and UTM. Each has advantages depending on your Mac model, technical skill, and budget.
1. Parallels Desktop
Parallels Desktop is the easiest method for installing Windows 11, especially on Apple Silicon Macs. It simplifies the setup process and allows seamless integration with macOS.
Highlights:
- 14-day free trial available
- Perfect for beginners, students, and professionals
- Run Windows apps alongside macOS apps
2. VMware Fusion
VMware Fusion is ideal for developers, IT users, and testers. It’s a robust virtualization tool that works well with existing VMware workflows.
Highlights:
- Free download (Broadcom account may be required)
- Best for developers and testing environments
- More manual setup than Parallels
3. UTM
UTM is a free, open-source virtualization app for macOS. It is suitable for advanced users or those wanting to experiment with Windows 11 ARM and other operating systems.
Highlights:
- Free manual download; $9.99 on Mac App Store for automatic updates
- Good for testing or open-source enthusiasts
- Does not support GPU virtualization, limiting some games and graphics-heavy apps
Can You Use Boot Camp to Install Windows 11 on Mac?
Boot Camp is available only on Intel-based Macs and is mainly used for Windows 10. Apple Silicon Macs cannot use Boot Camp because of their different architecture.
Recommendation:
- Apple Silicon Macs → Use Parallels Desktop
- Intel Macs → Virtual machine for Windows 11
- Boot Camp → Only for Windows 10 on supported Intel Macs
What You Need Before Installing Windows 11 on Mac
- Compatible Mac (Apple Silicon or Intel)
- Sufficient storage space
- Stable internet connection
- Virtualization software (Parallels, VMware Fusion, or UTM)
- Windows 11 installation image or automatic download via VM software
- Valid Windows 11 product key from Codesforever
Microsoft Requirements: 64-bit processor/SoC, 4 GB RAM, 64 GB storage, UEFI Secure Boot, TPM 2.0, and compatible graphics. Virtual machine software helps meet these requirements on Macs.
How to Install Windows 11 on Mac Using Parallels Desktop
Step 1: Check Your Mac Type
Apple menu → About This Mac → Check chip (M1/M2/M3/M4 = Apple Silicon, Intel = Intel Mac).
Step 2: Install Parallels Desktop
Download from the official Parallels website and install it.
Step 3: Create a New Virtual Machine
Follow prompts to install Windows 11 automatically. Apple Silicon Macs require ARM Windows 11.
Step 4: Allocate Storage and Memory
Use default settings or increase RAM/storage for better performance.
Step 5: Complete Windows 11 Setup
Sign in with Microsoft account and choose privacy settings.
Step 6: Activate Windows 11
Go to Settings → System → Activation → Change product key. Enter a valid Windows 11 Pro key from Codesforever.
Using VMware Fusion or UTM
The process is similar but more manual:
- Install VMware Fusion or UTM.
- Get the correct Windows 11 installation image (ARM for Apple Silicon, ISO for Intel).
- Create a new virtual machine and assign CPU, RAM, and storage.
- Install Windows 11.
- Activate with a valid Codesforever product key.
Windows 11 Home vs Pro on Mac
- Home: Suitable for basic apps, browsing, schoolwork.
- Pro: Best for business, remote work, development, and advanced features (BitLocker, Hyper-V, Remote Desktop).
For work or professional use, Windows 11 Pro is recommended.
Running Windows Apps on Mac
After installation, Windows apps work just like on a PC. Useful for:
- Microsoft-only business software
- Accounting and engineering tools
- School/university software
- Lightweight games
Performance depends on Mac model, RAM, storage, and VM software.
Gaming on Windows 11 Mac
Windows 11 on Mac supports some games, but high-end gaming is limited. Graphics-intensive apps may struggle on Apple Silicon virtual machines. Light and older games run fine, but a dedicated Windows PC is better for hardcore gaming.
Windows 11 Product Key on Mac
A valid product key from Codesforever is required for activation. Without it, Windows 11 runs with limited features and displays activation reminders.
Common Issues
- Slow installation → Increase RAM/CPU, ensure enough storage
- Activation fails → Check product key and Windows edition
- Apps don’t run → ARM compatibility issues on Apple Silicon
- Not enough disk space → Leave extra space for updates and apps.
Conclusion
Installing Windows 11 on a Mac is entirely possible and can unlock the best of both operating systems. Apple Silicon Mac users will find Parallels Desktop the easiest and most reliable method, while Intel Mac users have additional options like Boot Camp or other virtualization tools. Choosing the right version—Windows 11 Home for casual use or Windows 11 Pro for business and professional needs—ensures optimal performance. Always use a genuine product key from Codesforever to activate Windows 11 and access all features securely. With the right setup, running Windows apps on your Mac becomes seamless, efficient, and safe.
Frequently Asked Questions (FAQ)
Yes, using virtualization software like Parallels Desktop.
Yes, but activation requires a product key.
Only Intel Macs; Apple Silicon Macs cannot use Boot Camp.
Yes, for business, developers, and advanced features.
From Codesforever. Enter it under Settings → System → Activation.